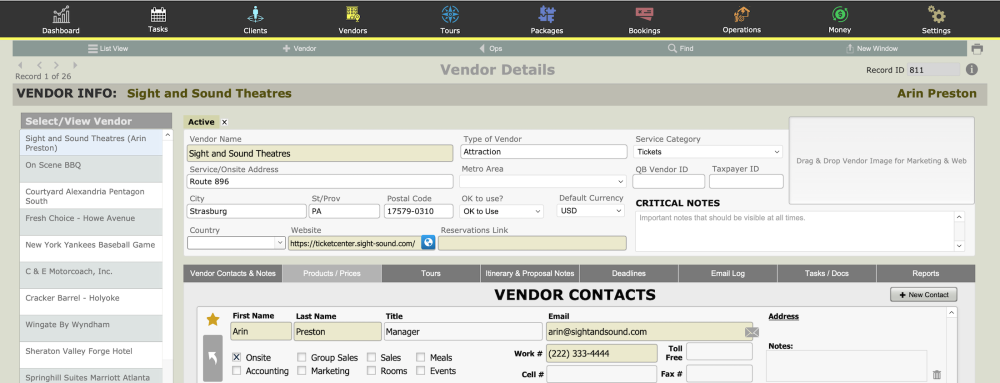
All primary modules in TourTools have a Detail View. In this view, you can view all of the details related to a particular Vendor.
Feature Buttons
List View
Use this button to return to the Vendor List View.
+ Vendor
Use this button to add a new Vendor record to the system. Click this link to jump to the section detailing the process to Add a New Vendor to your system.
< Ops
All buttons with a left pointing triangle will take you to related records. In this case, use this button to jump to the Operations records related to this Vendor.
Find
You can search for one or a group of record(s) by clicking on the “Find” button. Having clicked the button, you will be asked if you want to stay on the current screen or if you want to us the “Find” screen. This second option allows you to search additional fields not available on the current screen
Once you have entered your search criteria, you can simply hit the ENTER key to begin the Find/Search.
New Window
Clicking on the New Window allows you to open other modules within a new window so you can view 2 or 3 at the same time – this is especially helpful if you have more than one display.
Exploring the Vendor Details Layout
To keep things simple, we’re going to address first of all the information seen on the top half of the Vendor record. After that, we’ll go tab by tab through the bottom section.
Most of the fields are obvious as to the content. Phone fields will automatically format; in other words, there’s no need to include punctuation as you input the number, the system will add that for you. Select the Service Category and Type of Vendor from value lists that present. These lists are maintained in the Value Lists system module, accessed from the Settings > Business Settings. The Reservations Link is to jump to the page where you can book services with the Vendor, if different that the Website URL.
Critical Notes are important comments about the Vendor that you want to remain always visible – regular notes get pushed downward on the page as new notes are entered, creating a history of sorts.
There is a container for a Vendor image at the top right of the Vendor record. You can drag and drop an image here to keep handy for marketing purposes.
The Default Currency field will auto-fill with “USD”. If this is not correct, select from the value list the monetary unit that the Vendor will be paid in (this value list compiles based on the currency records that exist in the Currency system module, accessed from the Settings > Business Settings).
The QB Vendor ID is only relevant if you have the QuickBooks Module. This ID number relates to the associated record in your QuickBooks account. Add the Vendor’s Taxpayer ID if it is relevant to you.
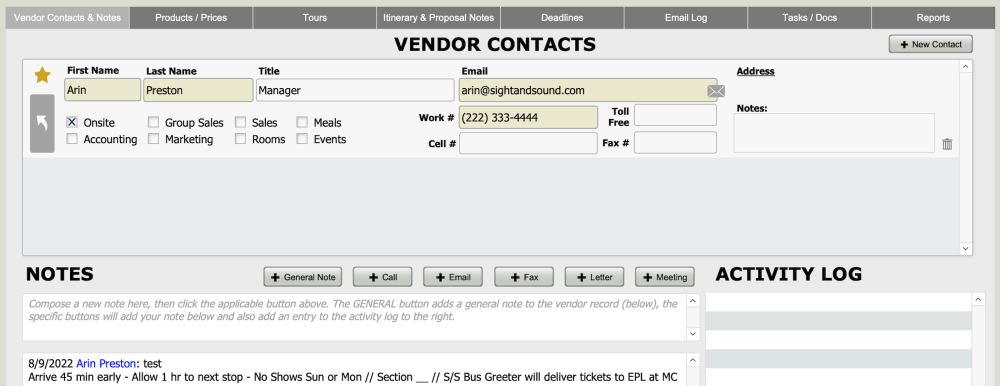
Vendor Contacts & Notes Tab
Enter all of your contacts for this Vendor in the Contacts portal. The contact that you designate as “primary” (by clicking on the star icon and seeing it turn yellow) will push this contact’s information to the list view for the Vendor.
Products / Prices Tab
The loading of services you have contracted with your Vendors begins here.
It might be helpful to think of the relationships in this part of the system as a series of file cabinets, each of which has multiple drawers, in which are contained all of your contracts. In the example that follows, Lynne’s Cruise Line — the Vendor — is the file cabinet, and we are about to allocate and label one drawer (a Product record), in which we expect to find paperwork documenting all of the reservations we have made for accommodations and meals anytime during 2022 (represented by Contracted Service records). At the point we contract services for 2023, we will create — manually or via the “duplicate” process — a second Product record (a second drawer), in which we will find Contracted Service records (contracts) related to reservations for the new year.
Click on this link for details on how to use the Product Library & Contracted Services.
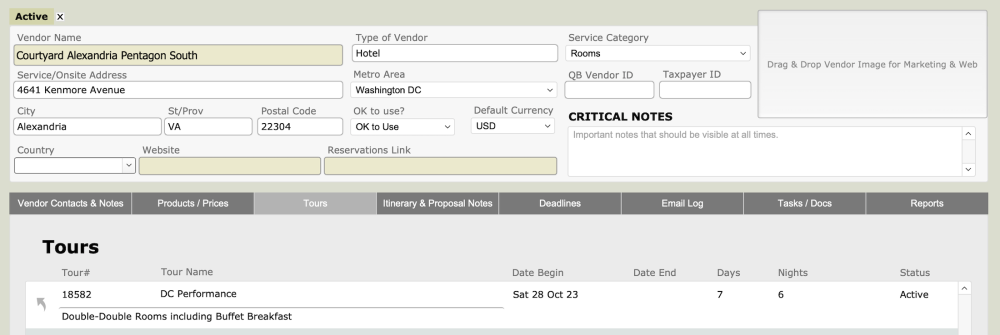
Tours Tab
This tab shows a list of Tours that include products/services from this Vendor.
Itinerary & Proposal Notes Tab
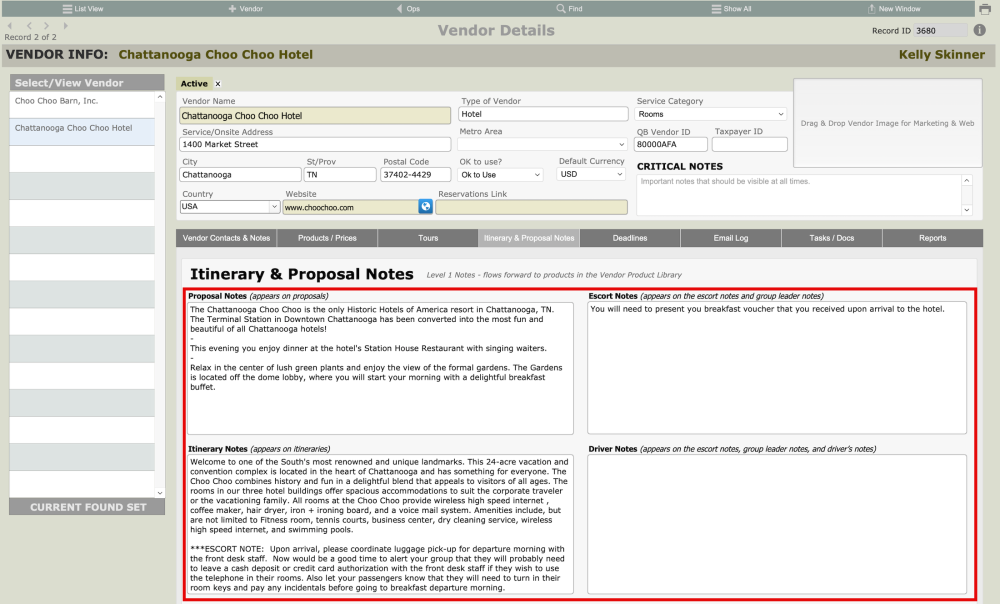
This is one of many spots where you can enter “notes” that become part of printed documents later on. The field labels give an indication of which notes appear on what documents.
You may wish to enter colorful and enticing marketing copy into the Proposal Notes field.
Itinerary Notes tend to be more informational or instructional, as they are included on documents provided to the individual travelers.
In the Escort Notes field, common entries include information that your escort should be aware of like restaurant hours, the fact that the hotel likes to welcome the group upon arrival, etc.
In the Drivers Notes field you might touch on where passengers should be dropped and where parking is available.
Click this link for a more in-depth description of how Vendor Product Notes work within the TourTools system (where they originate, how they can be edited, etc.).
Meanwhile, given that notes will copy from one part of the system to the next in sort of a hierarchical way, it makes sense to initially load multiple descriptions at the Vendor level, knowing that edits are possible as you move along. By example, the Vendor might be a hotel, for which you are going to create Contracted Service records for rooms and for meals. Go ahead and enter descriptive information for both services in the same field, knowing that what is not appropriate to the specific record down line can be edited out, without there being any effect on the original note.
Deadlines Tab
Fields in this area should be completed only when the deadlines, amounts and terms referenced are always the same for the Vendor, which in reality is rarely the case. More often than not, deadlines and amounts are dependent on variables like the date of service, the size of the group, and the like. As such, it usually makes more sense to create Task reminders in your Ops records, which will be tied to a very specific service, in connection with a very specific tour. If you do elect to fill in the fields here, Task reminders will be created for you each and every time this Vendor is linked to a Package.
Email Log Tab
This tab, as you’d expect, shows email activity related to this Vendor and allows you to recall the details as needed. If it was selected at time of sending, attachments are saved and available for reference as well.
Tasks / Docs Tab
Functionality in the Tasks area is identical to what happens in Client and all other modules. Add tasks related to the Vendor by using the + Task button – they will come find you on the Dashboard as they require action.
Documents associated with a particular Vendor, perhaps a copy of a motorcoach company’s promo ad with photos and specs on their fleet, can be attached to the record by clicking on the + Document button. You will be stepped through the process of naming and describing the document, then browsing, identifying and attaching the document.
Reports Tab
There are a few pre-built reports that come included with the Vendor module. You can add as many custom reports, docs, and lists as you’d like. Contact TourTools support if you have something in mind, we can build it for you quickly. For details, see the Vendor Reports & Docs section that follows.
If you have any questions that are not answered here Contact TourTools Support for assistance.


Post your comment on this topic.