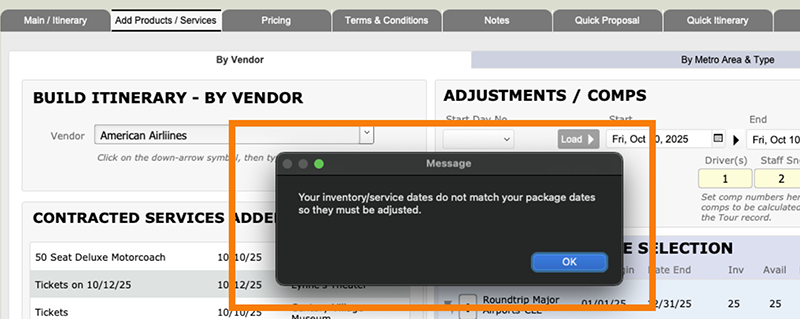
Navigate to the Add Products / Services tab to begin the process of building your itinerary.
Building an Itinerary
The next order of business is to build an itinerary, using the services that constitute the Package, and there are two ways to do this. The first method is to build the itinerary right out of the Package Module.
The Build from Package Method
You can build an itinerary by remaining in Package and going to the tab labeled Add Products/Services. What will present is a series of three tabs, inviting your selection by Vendor, or Metro Area and Type. Vendor will allow you to select from an alpha list of all suppliers; and _Metro Area / Type allows a dual pick on the Metro Area as well as the Type of service represented in the Contracted Service.
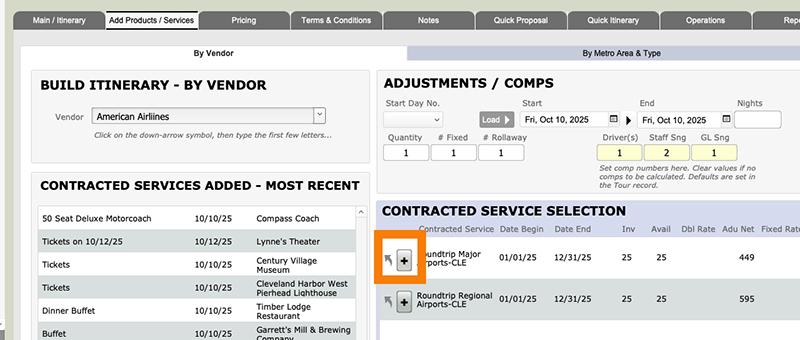
Once you make your selection, the Contracted Service records for the Vendor will be visible in the portal to the right.
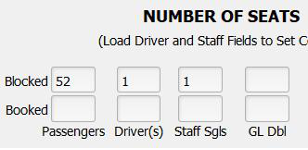
You’ll see there is a Day Pop-Up at the top of the screen, which can be used to load the Start and End dates in the same way, and there are fields to indicate the number of per-person (Quantity) and fixed (# Fixed) items. As explained on the previous page, the fields to the right—labeled Driver, Staff Sng, and Staff Dbl—will be auto-populated from Tours.
To load the service to the itinerary, simply click on the “+” button preceding the description of the Contracted Services record.
The extra field, labeled Nights (upper right), can be used to load successive hotel nights that have been loaded as individual Contracted Services records. For example, imagine there are Contracted Services records for overnights on June 25, June 26 and June 27. If we type “3” as the number of nights, set the beginning/ending dates to June 25/26 and select the June 25 price element record, that and the June 26 and June 27 elements will be swept into the itinerary.
Reference the “mini itinerary” on the left to see what’s been loaded. When you finish loading all services, click back on the “Main Itinerary” tab.
The Attach Method
An alternate method for building an itinerary, would be the Attach Method.
From Package, click on the (back to) “< Vendor” button and, once in the Vendor database, find the first Vendor whose services you want to add. It makes some sense to attach records in the order they are going to be presented on tour, in other words, your motorcoach might be added first, followed by your first lunch stop, dinner and then a hotel overnight.

What you will see next is the Confirmation screen. If your service is inventoried for a specific date or date range, the Begin and End Date will have set themselves. If that doesn’t happen, you need to set them manually by 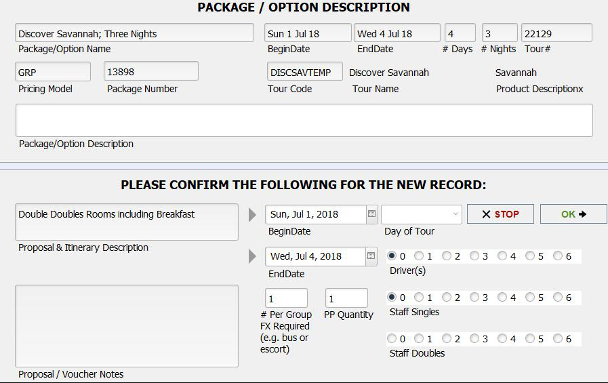
The next thing you want to consider is whether you need to sell multiples of the service. If your service was a lunch voucher, by example, and you wanted to sell three of them without specifically assigning them to three different dates, set the first date and then input “3” in the PP Quantity field. Do the same if the service is a fixed cost item—a motorcoach, by example—by changing the figure that displays in the # Per Group FX Required field.
The series of buttons labeled “Driver(s)”, “Staff Singles” and “Staff Doubles” are all about comps that need to be provided for in your pricing. In our example, the Contracted Services record about to be attached is for a Room. If you know that the hotel is going to give you a free or discounted room for your driver but not your tour manager, then you may want to click on the “1” button above “Staff Singles” to indicate that when the Package is priced, the cost of a single room needs to be prorated over the paying participants and added to the bottom line as a cost.
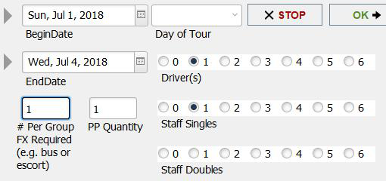
When each of the fields is set correctly, click on the “OK” button. If for any reason you need to back up, just click on “Stop”.
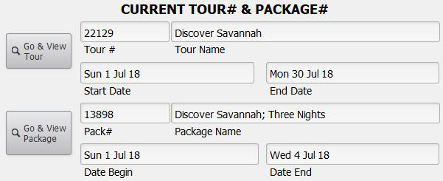
Build the entire itinerary by cycling through Vendor records in this same manner, and once you finish, use the “< Back” button to return to Package. Note that it’s also possible to temporarily return to Package for a quick look at the itinerary by using the button “Go & View Package” in the upper right of the screen. If, for any reason, you want to have a glimpse of the Tour record, use the “Go & View Tour” button.
Managing/Adjusting an Itinerary
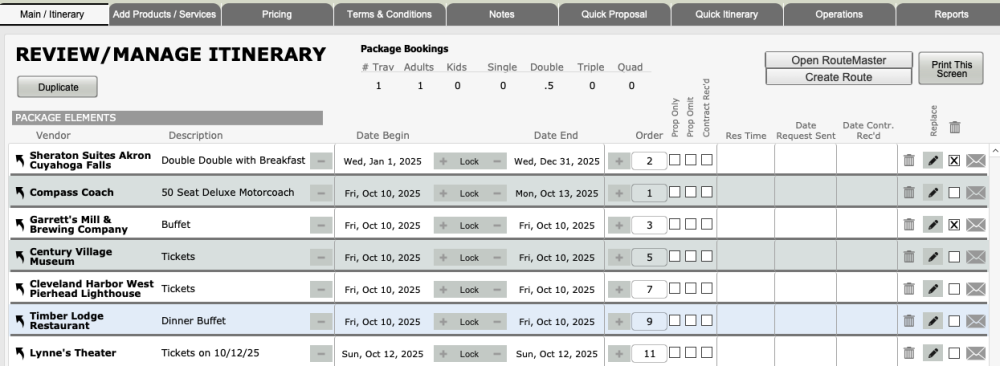
Back on the Main Itinerary tab in Package, you’ll notice that each Contracted Service record – now referred to as a “Package Element” – has been assigned an order number. Regardless of the order in which you loaded them, by default, TourTools will sort your records by departure date, but you can rearrange same-day services by changing the order numbers. Just overwrite what’s already there, click outside the field, and your records will shuffle. Click the “Prop Omit” button for any services that you don’t want to appear on the proposal or itinerary; tour manager per-diems, by example.
You can view and rearrange Package inclusions on this screen. You can also swap out one Vendor service for another using the “Replace” button. When doing so, the original component is deleted, and the List by Name screen will appear. The system assumes you want to replace with a service from the same Vendor, so those choices appear initially, but you can select another Vendor if that is appropriate. The functionality from there is exactly as what you experienced when you built the Package originally.
If a replace is needed simply because you want to change the date, you can use the buttons labeled with the plus and minus signs that precede and follow the start and end dates. In this example, if you wanted the third service to be June 26 instead of June 27, you could click on the – signs as indicated. Obviously, this will work only in cases where the Contracted Services record has been set up with wide ranging usage dates.
The button between the dates is by default labeled “Lock”. If for whatever reason you want to signal that the date should not be altered, click it (at which point the label will toggle to “Unlock”).


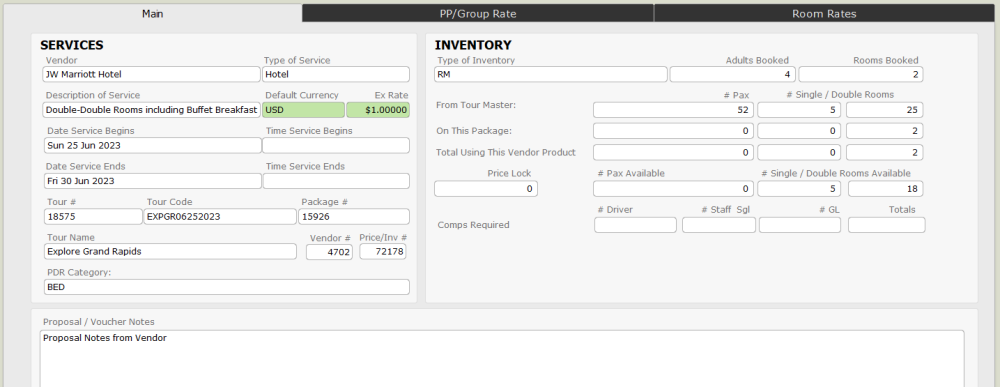
On the first tab, you can reference some basic information, including the Contracted Services record to which it is associated. If the service has a per-person or a fixed cost component to it, click the second tab to reference those details. If it is a room record, click the third tab.
Basically, these screens allow you to reference Contracted Service details without having to go back to Vendor. In addition, numbers having to do with inventory counts in the Tour or the specific Package are visible, and the fields labeled “Total Using This Vendor Product Item” will show the total of passengers or rooms using/sharing the same Contracted Service record; not necessarily on just this tour.
The fields adjacent to the label “Comps Required” reflect the number of comps that were factored in for tour personnel when the particular Contracted Services record became part of the itinerary. If you want to change these numbers, the fields are open to entry which basically spares you having to go through the process of replacing it in order to change the comp allowance. Be aware that if you do make alterations here, the Package “Priced? Status” will go from OK to “Reprice”, since—as mentioned previously—the change you make affects the selling price.
There are three buttons at the top of the screen: Continue, Update Exchange, and Update Prices.


Note that any time you do something within Package that affects the selling price, TourTools will prompt you to choose between altering the net or the selling cost of the Package. As an example, if a restaurant used in a Package increased the dinner cost by $5.00 and you updated that cost in Package, you would have the option of eating (no pun intended!) the increase or passing it on to your travelers. By picking “Net” at the prompt, your net cost would increase (lowering your profit margin) but your selling price would remain the same. If you opt to increase the selling price, you will be prompted to re-price the Package. In cases where the Package is already published and has been sold, the Package price in any Bookings previously made will be increased.
At the point your itinerary is complete, you are ready to price and publish.
Quick Setup Method for Packages
If you have any questions that are not answered here Contact TourTools Support for assistance.




Post your comment on this topic.