We will first look at setting up Microsoft email accounts, followed by Google Gmail accounts toward the end of this section. It is important to note that this configuration must be completed prior to setting up user email accounts, which is covered in the next section of this guide.
It is highly recommended that an IT-savvy staff member or IT consultant perform these prerequisite steps. The Microsoft/Google settings and button locations change frequently, so there may be slight differences in what you see in this section and what you see in your Microsoft/Google account. We are happy to connect with you and walk you through this process, just send an email to [email protected] to request a meeting.
Setup for Microsoft Office 365 Email Accounts
This section is based on this Microsoft article and has been adapted for use with TourTools in the instructions below. The Microsoft settings and button locations change frequently, so there may be slight differences in what you see in this section and what you see in your Microsoft account.
Prerequisites
To register your app in Microsoft Entra ID, you need a subscription to Office 365 and a subscription to Azure that has been associated with your Office 365 subscription.
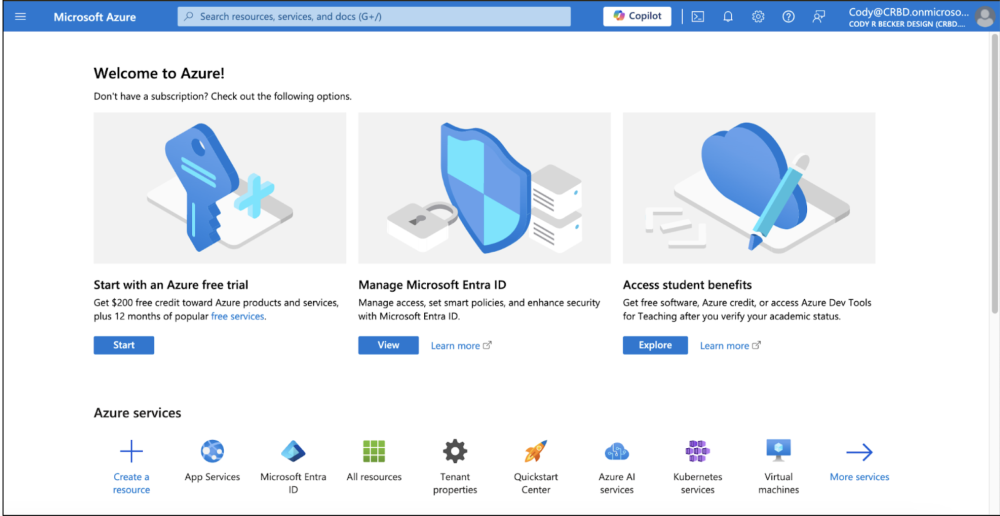
Use the Azure Portal to register your application in Microsoft Entra ID
- After you have a Microsoft tenant with the proper subscriptions, you can register your application in Microsoft Entra ID.
- Sign into the Azure portal , using the credential of your Microsoft tenant that has the subscription to Office 365 you wish to use. You can also access the Azure Portal via a link that appears in the left navigation pane in the Microsoft 365 admin center.
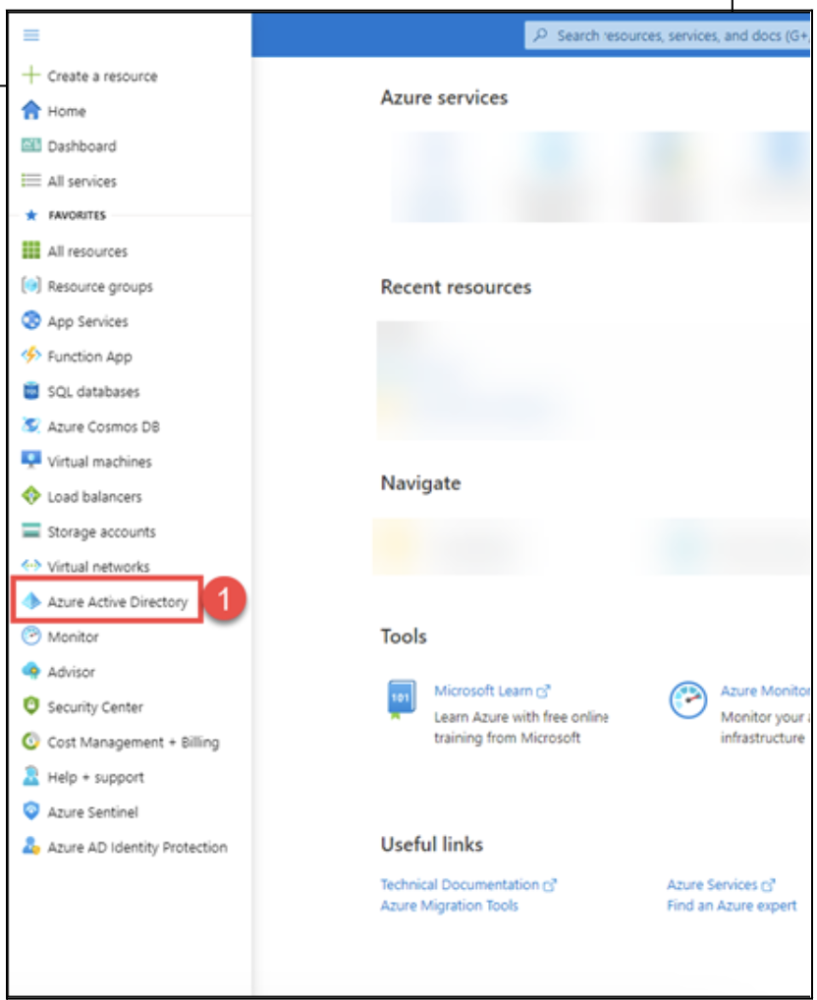
- In the left navigation pane, select Microsoft Entra ID (1).
On the Microsoft Entra ID page:
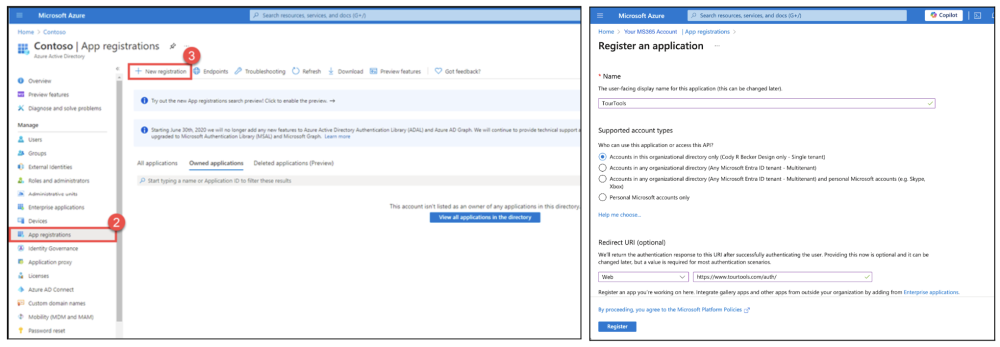
- Select Manage
- Then select App registrations (2), and then select New registration (3).
A new page appears for you to start the registration of your app.
On the Register an application page, complete the following things:
- Name your app.
- Choose who can use the app and access the API (Single Tenant).
- Provide a redirect URL for user redirect after authentication (https://www.tourtools.com/auth/).
- Click Register to register the new app.
Generate a new key for your application
Keys, also known as client secrets, are used when exchanging an authorization code for an access token.
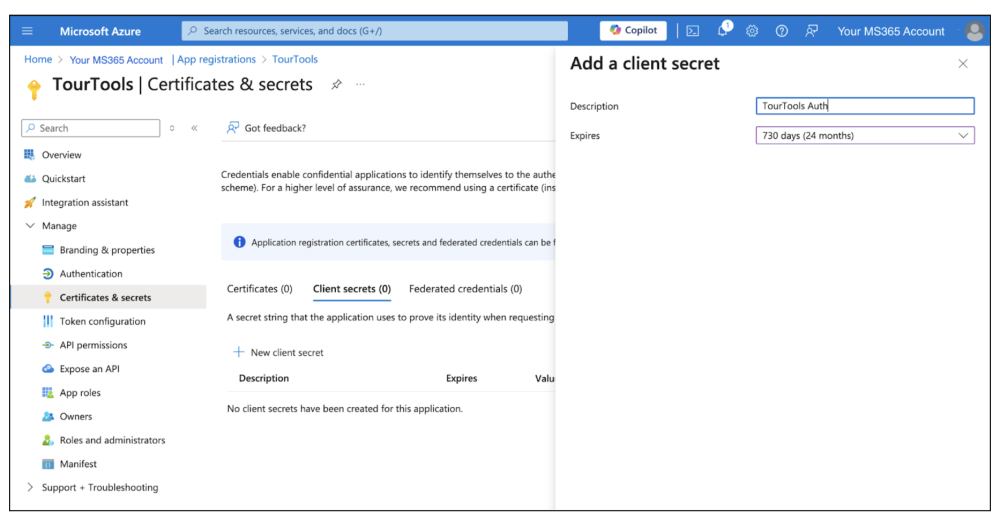
- Click on Certificates & secrets
- Click +New client secret
- Add description
- Set Expires to 24 months
- Click Add
- Copy the Secret Value and paste somewhere safe to use later in the process as well as to store (secret will not be available after setup is complete)
Specify the permissions your app requires to access
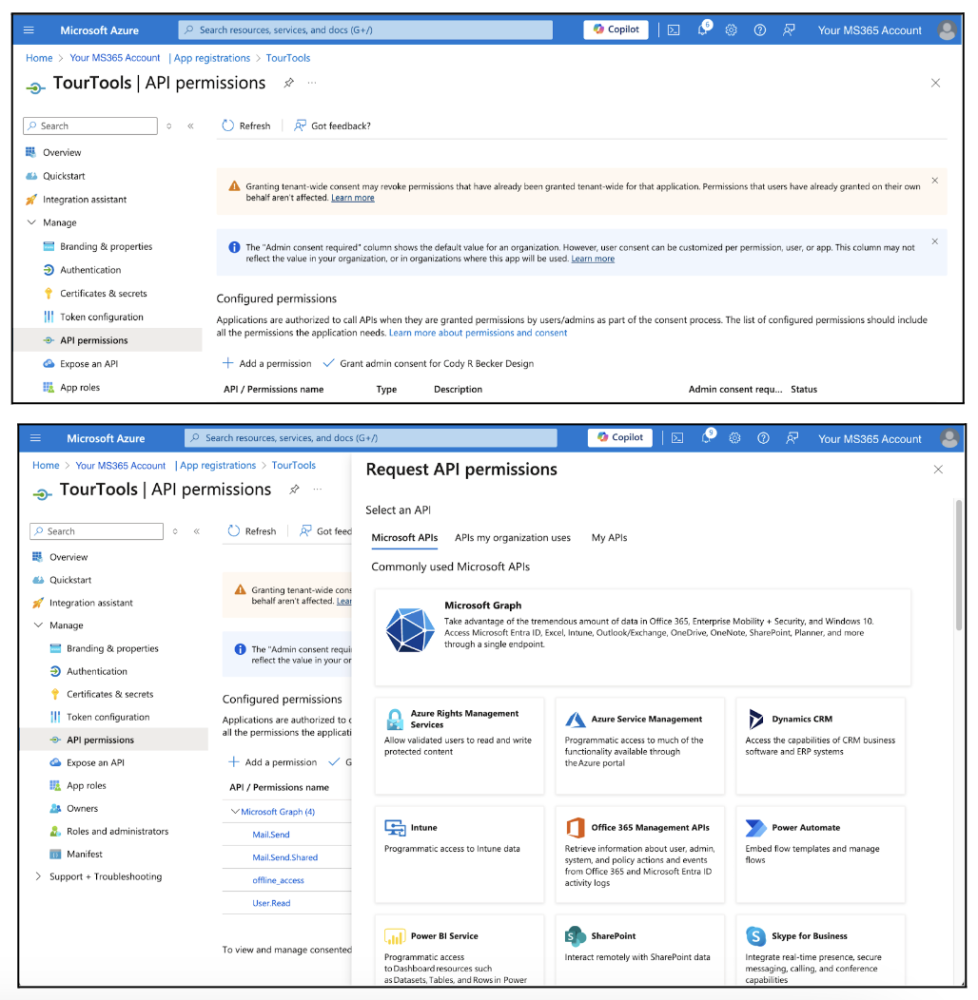
- Click on API Permissions from the navigation menu
- Click +Add a permission
- On the side pane, click on Microsoft Graph
Delegated Permissions
Click on Delegated permissions
Begin typing the name
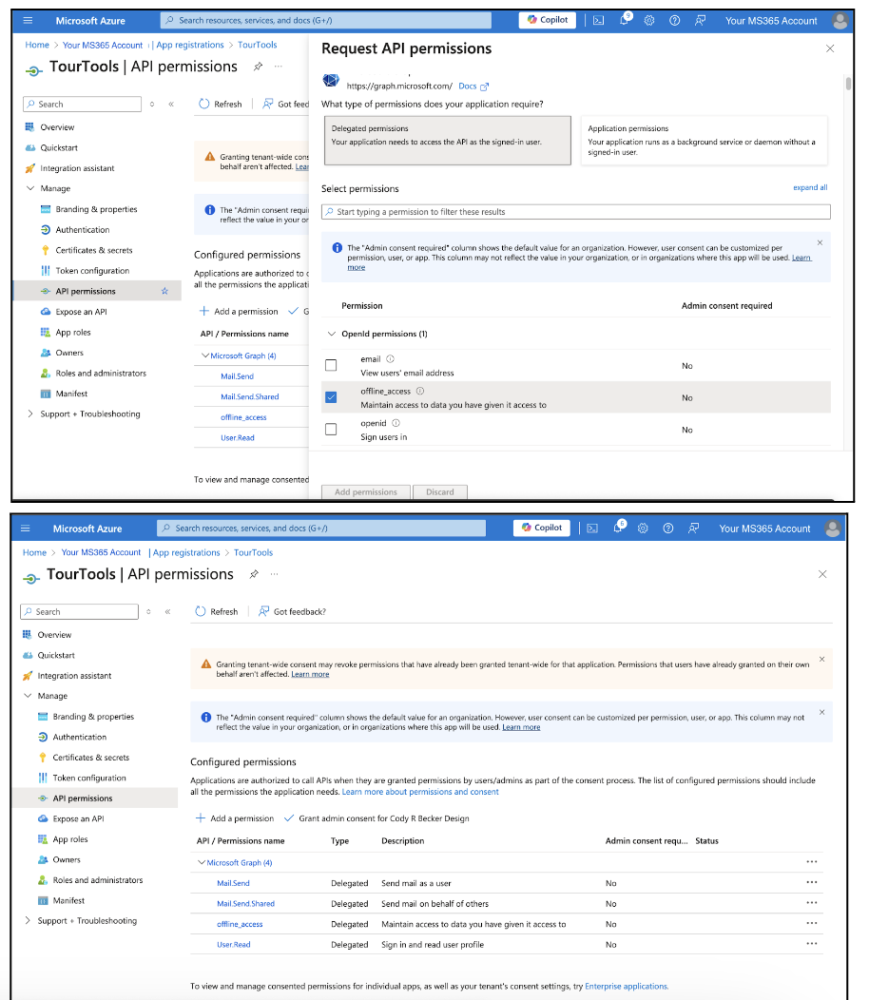
You will need 4 Delegated permissions for this API
- Begin typing in the Select permissions field and the permissions will appear.
- Click the checkbox to select the permissions:
a. Mail.Send
b. Mail.Send.Shared
c. offline_access
d. User.Read - When you have selected all of the permissions, click Add permissions
- Check to make sure you have the same permissions as appear in this image:
- Then click Grant admin consent for (your Tenant name)
Expose an API
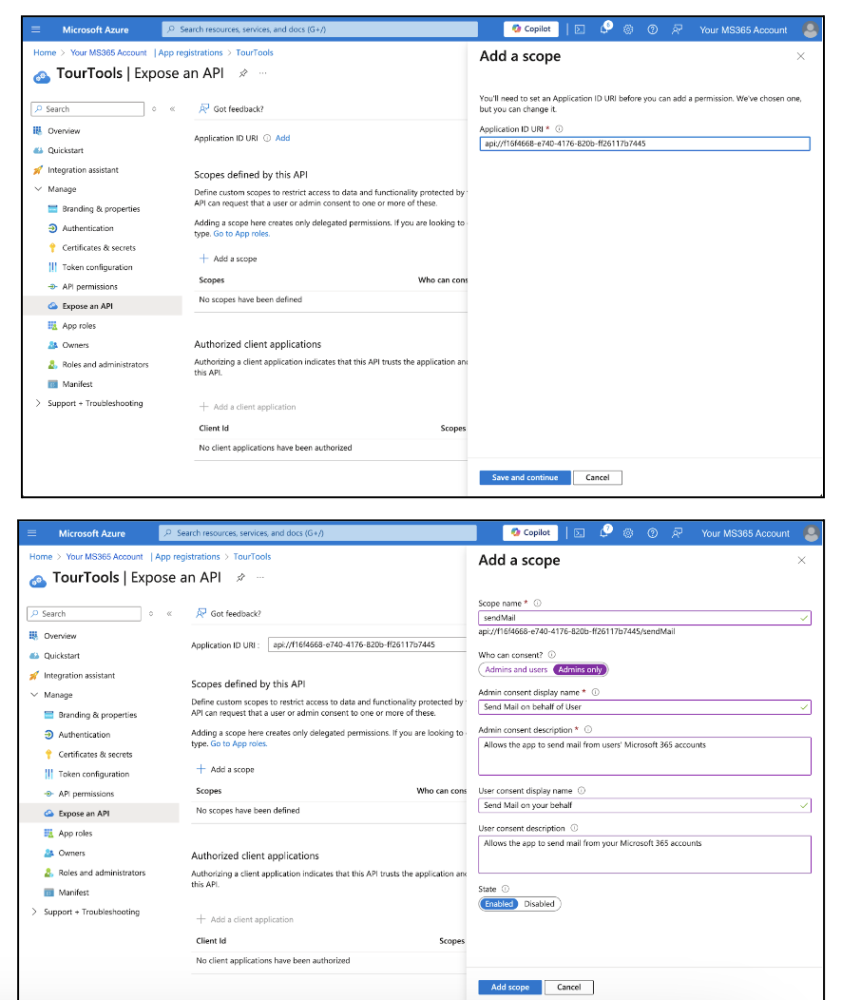
- Click Expose an API menu item
- Click +Add a scope. In the side pane:
- Leave the Application ID URI as assigned and press Save and continue
- Fill in the fields as they appear in the diagram below
- Scope name: sendMail
- Who can consent? Admin only
- Admin consent display name: Send mail on behalf of User
- Admin consent description: Allows the app to send mail from users’ Microsoft 365 accounts
- User consent display name Send Mail on your behalf
- User consent description Allows the app to send mail from your Microsoft 365 accounts
- Click Add scope
Add a client application
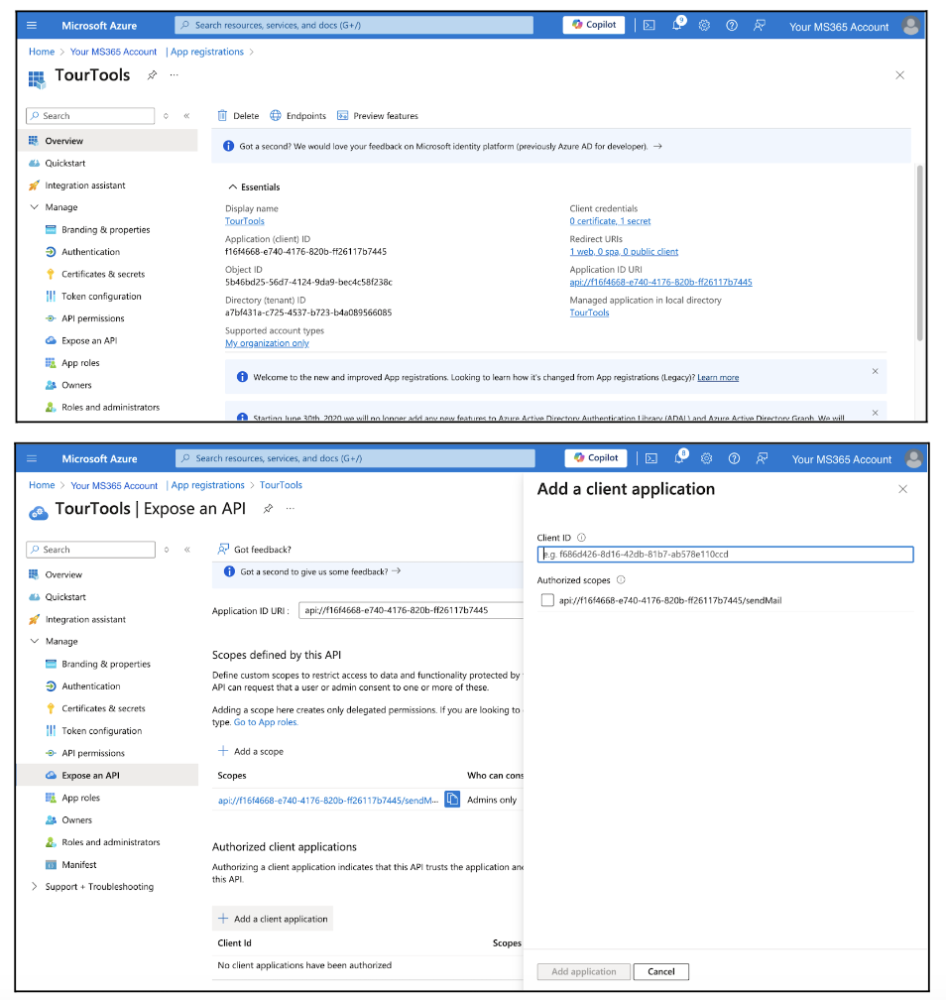
Go to overview and copy the Application (client) ID and the Directory (tenant) ID to a separate document to be used in the next step and later in the process.
Go back to Expose an API
Below Add a scope, click +Add a client application
On the side bar, paste the Client ID
Check checkbox beside the Authorized scope that appears
Click Add application (bottom of page)
All information required for configuring email within TourTools has now been gathered. Next, go back into TourTools and in the top navigation bar, click on Settings > System Settings > Email & Integrations > and click on the Email tab.
- Select O365
- Enter Application (client) ID in Client ID
- Enter Secret in Client Secret
- Enter the Redirect URI: http://tourtools.com/auth
- Enter your Tenant ID in Tenant
- Check to see that authURL matches exactly (no spaces or returns): https://login.microsoftonline.com/<>/oauth2/v2.0/authorize?client_id=<>&scope=Mail.Send offline_access&response_type=code&redirect_uri=<>
- Check to see that accessTokenURL matches exactly (no spaces or returns): https://login.microsoftonline.com/<>/oauth2/v2.0/token
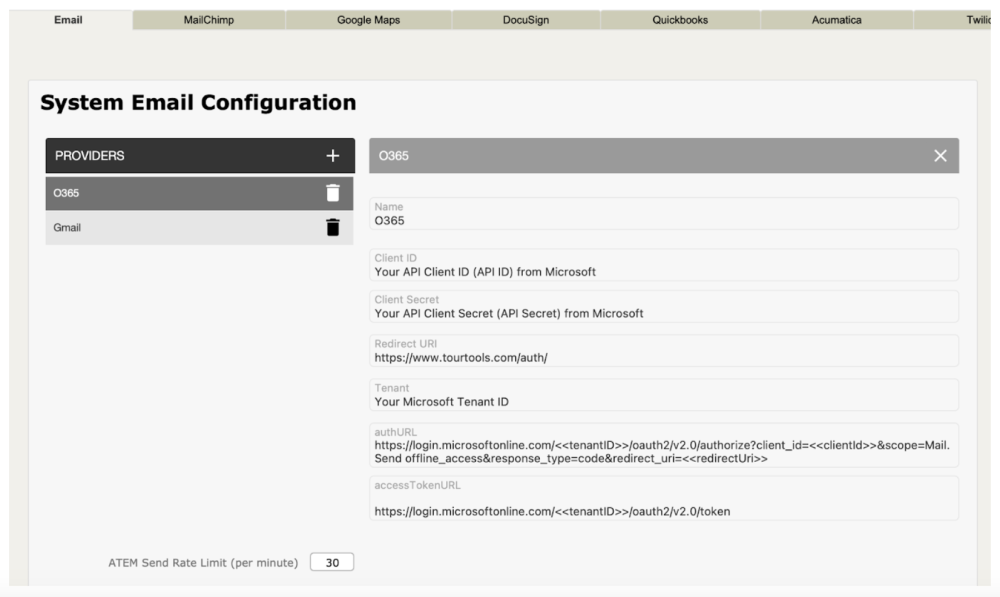
TourTools Email API Connection
Using the Microsoft Graph API with the configuration above, a Microsoft 365 (Azure) administrator can authenticate all users of TourTools in the same 365 account.
- Go to Settings > Business Settings > Staff Members.
- Select the email address of an administrator of your Microsoft 365 (Azure) account by pressing the arrow beside the user name.
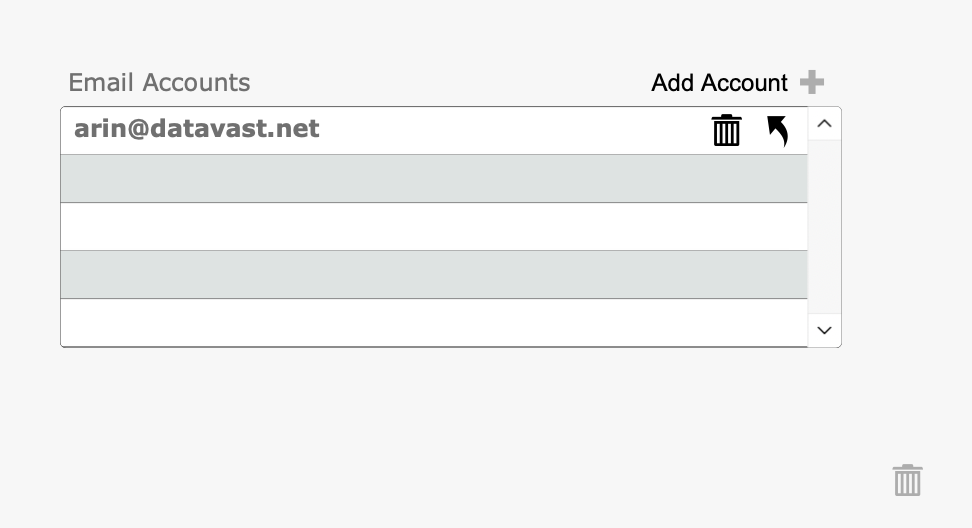
- In Staff Details at the bottom right, select/add an Email account and press the arrow button (or click Add Account).
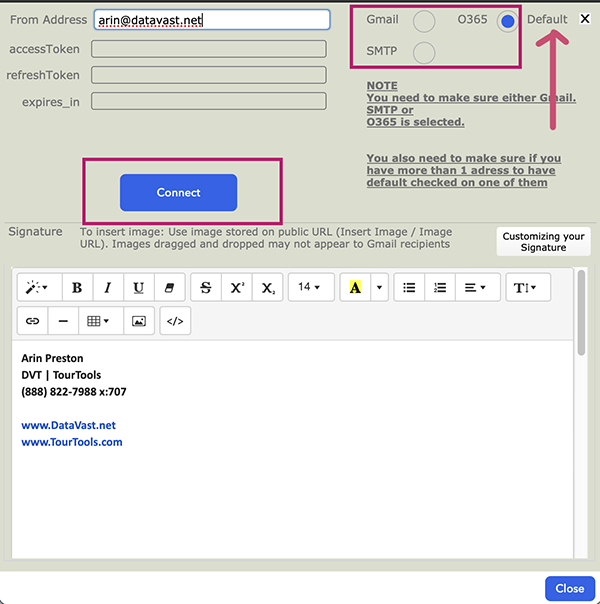
- Verify or add the From email address.
- Click O365.
- Click the CLOSE button to close the window.
To consent to allowing TourTools to access your organization’s email, the next steps must be completed by someone with admin privileges in Microsoft Account. - Go to User settings, click on the arrow beside the newly created email address.
- Click Connect.
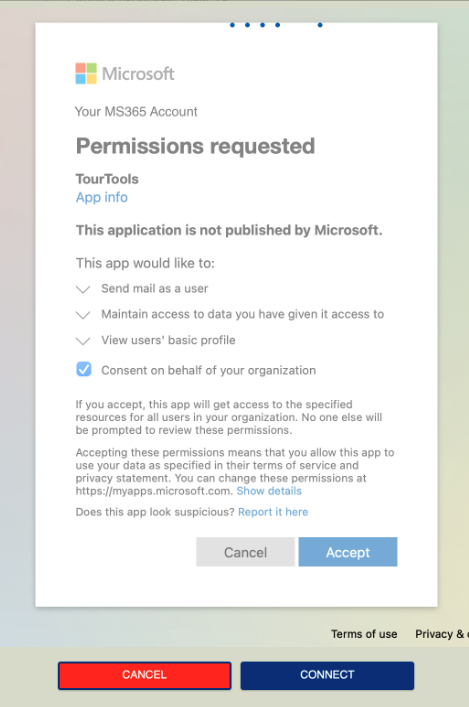
- You will be brought to the Microsoft Authorization page where you may consent on behalf of your organization.
- Follow the instructions from Microsoft.
- Click Accept.
- Click CONNECT at the bottom of the window.
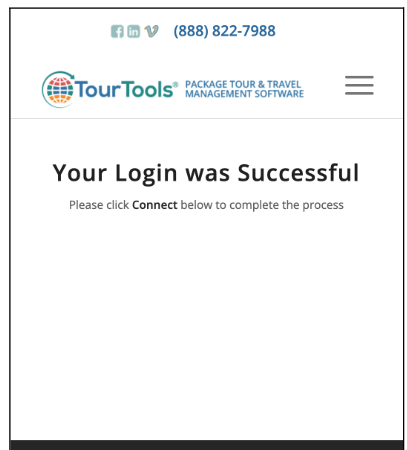
- You will be brought to the redirect page letting you know that your connection is successful.
- Click CONNECT at the bottom of the window. You’re all set!
NOTE: If you receive an error message, when requesting permission, wait 15 minutes and try again as there can be a delay with the setup of the API. If problems persist, please contact TourTools support
Managers should go through all Staff records and add email accounts for the team (just ADD the authorized email account addresses – the user will authenticate and set up the account and email signature as outlined in the next section.
Setup for Google Gmail Accounts
We are currently updating the Google/Gmail instructions, please send an email to [email protected] to request a meeting and we will assist you with the preliminary setup.
If you have any questions that are not answered here Contact TourTools Support for assistance.




Post your comment on this topic.