Clicking on the large Module Navigation button labeled “Settings” at the top right of the screen allows access to various settings for the TourTools system. All can access User Settings; Business and System Settings are available to Owners and Managers only; Developer Settings are only accessible to the TourTools Support Team.
The BUSINESS SETTINGS are meant for the Owner and ManAgers. This is where TourTools defaults and system-wide settings and values can be set and managed. This is also where the Division and Staff databases are maintained.
Company / Division
Many TourTools clients have multiple divisions or brands under which they sell tours. This is where those details are managed. The logos and company information specified here will pipe out to reports and documents generated for Tours and Bookings associated with a specific division. Check the box labeled “Auto Set Division 1” if you only have 1 division. If you have more than 1 division, remember to set the appropriate division on each Tour you create. As long as the division is properly set in the Tour record, it will automatically be set for all Packages and Bookings associated with that Tour.
Click here for details on Assigning Divisions to a Tour.
Staff Members
This is where all of your staff data is managed. When you hire a new person, be sure to add them here (or remove them when they leave). This is an important step in the new user/workstation setup process. TourTools will not function properly for a new staff member if they are not represented here.
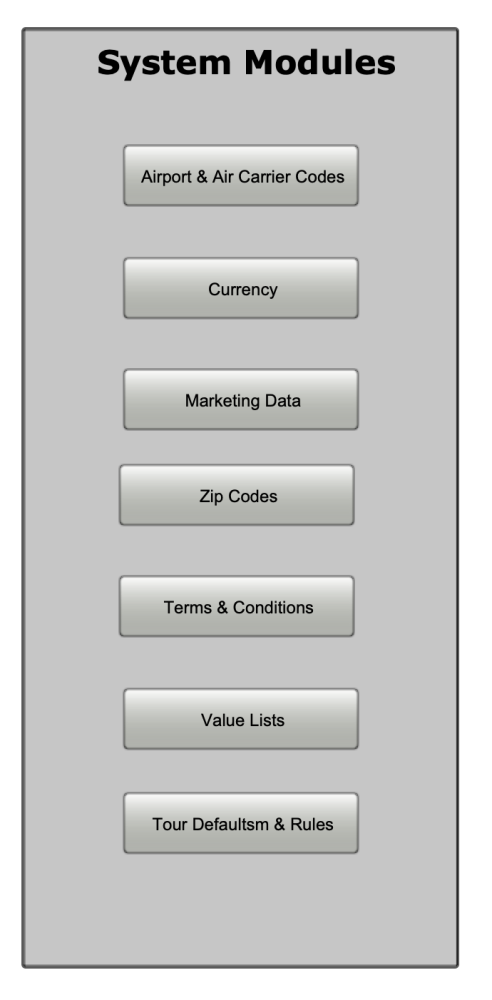
System Modules

Airport & Air Carrier Codes
These come pre-loaded with your TourTools v5 system. You can add/remove and modify values as needed. These are used in the Tours and Bookings modules for managing flight itineraries.
Currency
In TourTools, all Tours are priced/sold in USD only. The Currency system module manages the currency in which you pay specific Vendors (you will find extensive details about managing currency in Chapter 3).
Marketing Data
This module is used to identify your marketing campaigns and then associate various Clients and Bookings with them. It allows a high level of analysis on how your marketing dollars are spent and which campaigns are most effective. Here is an example to explain what a SOURCE and SEGMENT designate in this part of the system:
SOURCE: ABA Marketplace Conference
SEGMENT: 2025 Philly
SEGMENT: 2024 Nashville
SEGMENT: 2023 Grapevine
SOURCE: Group Travel Magaize
SEGMENT: July 2024 Issue
SEGMENT: November 2023 Issue
Zip Codes
You will most likely never need to access this database of zip codes. It is used to identify and auto-fill the cities and states as you enter the zip codes for Clients and Vendors.
Terms & Conditions
This is where the default text for your Terms & Conditions are set. These can be pulled into Packages on the Terms & Conditions tab. We suggest that you add as much verbiage here (for as many scenarios as possible) and then delete out what doesn’t apply as the text is pulled into a package.
Value Lists
This allows Owners and Managers access to update value lists that populate in various parts of the system.
Tour Defaults & Rules
This is where you will set the default values for primary fields that will be added to every new Tour record. These values are entered as soon as you set a departure date for the Tour.
eBlast Templates
Manage your Client and Vendor eBlast templates on this tab. These can be used in recurring email campaigns. Your eBlast templates can include multiple attachments.
DB Announcements
There are 2 areas of the Dashboard set aside for announcements. Enter details on this tab and choose whether to highlight the information or not. All logged in users will see these announcements in real-time.
Guides
If you have regular guides that you use on your Tours, you can manage them here – much like an external staff database. Guides can be assigned to specific Tours and reports can be run to determine usage and availability.
Insurance Tables
If you are selling insurance within TourTools, manage the data tables on this tab. Contact the TourTools team if this is something you are interested in exploring.
TourTools Event Log
This event log will allow you to audit critical activity in your system and identify the user that performed the action and the date it occurred.
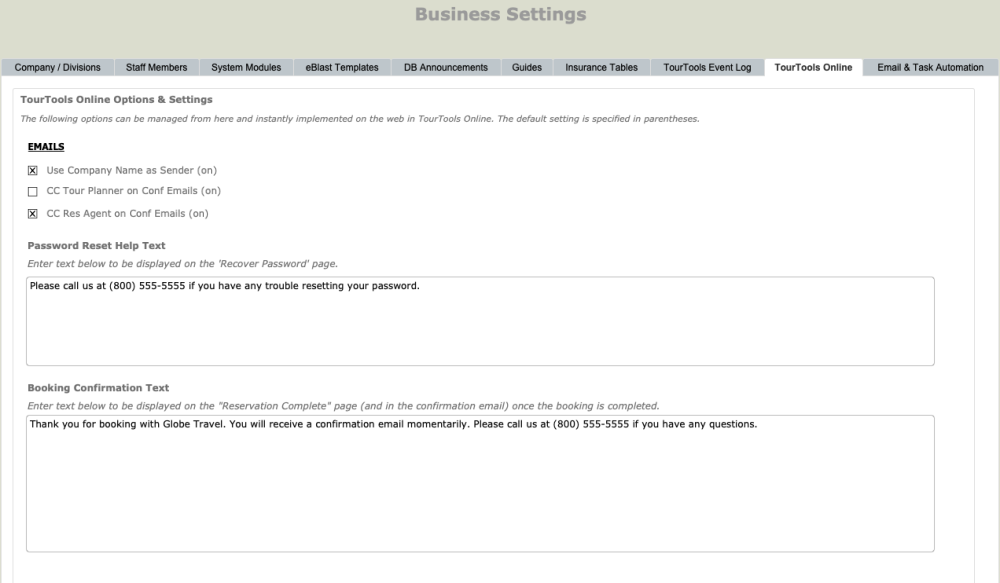
TourTools Online
This tab allows you to manage certain settings and default text for TourTools Online, if you have it as an add-on to your back office system.
If you have any questions that are not answered here Contact TourTools Support for assistance.


Post your comment on this topic.