
To create a new Client record, click on the “+ Client” button in either the List View or the Detail View.
You will be presented with two tabs where you are able to enter the information for a new Client. As soon as you add a First Name on the first tab, the “Salutation (Dear) Name” field will populate with that same name. The content of that field is what will appear after the “Dear” in any letter that you eventually generate from the system. If your relationship to the clients is friendly; “Gail”, might suffice; if a more formal salutation is appropriate, type “Ms. Barron”.
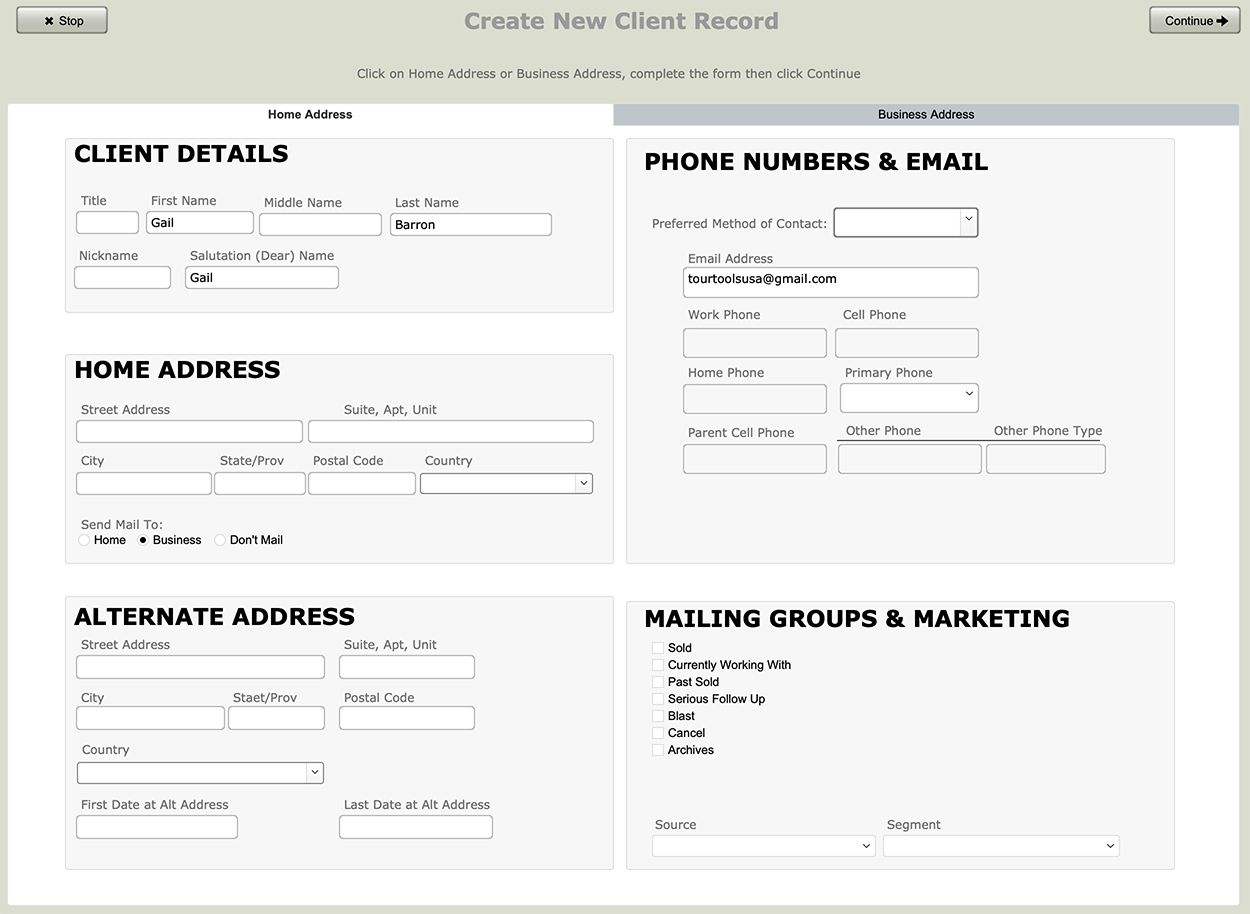
Input address details as well as phone numbers and email addresses.
Note that, dependent on which tab you are working—Home Address or Business Address—the related “Send Mail To” value will have been selected automatically. That value can be changed manually as appropriate, and in cases where you don’t want mail to be directed to the Client in question, click “Don’t Mail”.
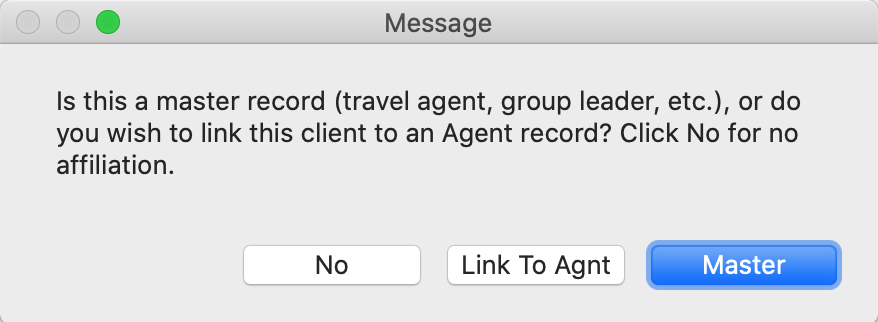 The remaining fields are explained in detail as we continue tab by tab through a completed Client record. Meanwhile, there is one question that you will be prompted to answer before a record is complete, and that is whether or not it is a “Master” or should be linked to a “Master”.
You will mark the Client as a “Master” when the record is for a re-seller of your product; another tour operator or travel agent, a group leader, perhaps the director of a senior center. A “Master” could also be a set of grandparents who are taking their entire family on a vacation that they are financing. Two things generally dictate tagging the record a “Master”: 1) You will not be receiving any contact information for their travelers; and 2) You will not be receiving payments from those travelers direct. Identifying a Client as a “Master” is what will enable your generating what is called a “Group Leader Invoice” in Bookings; i.e. an invoice representing charges for the entire group (explained in more detail in Chapter 7).
If the client is someone who sometimes books directly with you, and sometimes travels with one of your group leaders, you will click on the “Link to Agnt” button. When you do so, a dialog box will open, prompting you to identify the Master Record to which the record should be linked. From the list of clients who meet your “find” criteria, click on the name of choice and click “Continue”. Once you finish you will be returned to the main client entry screen.
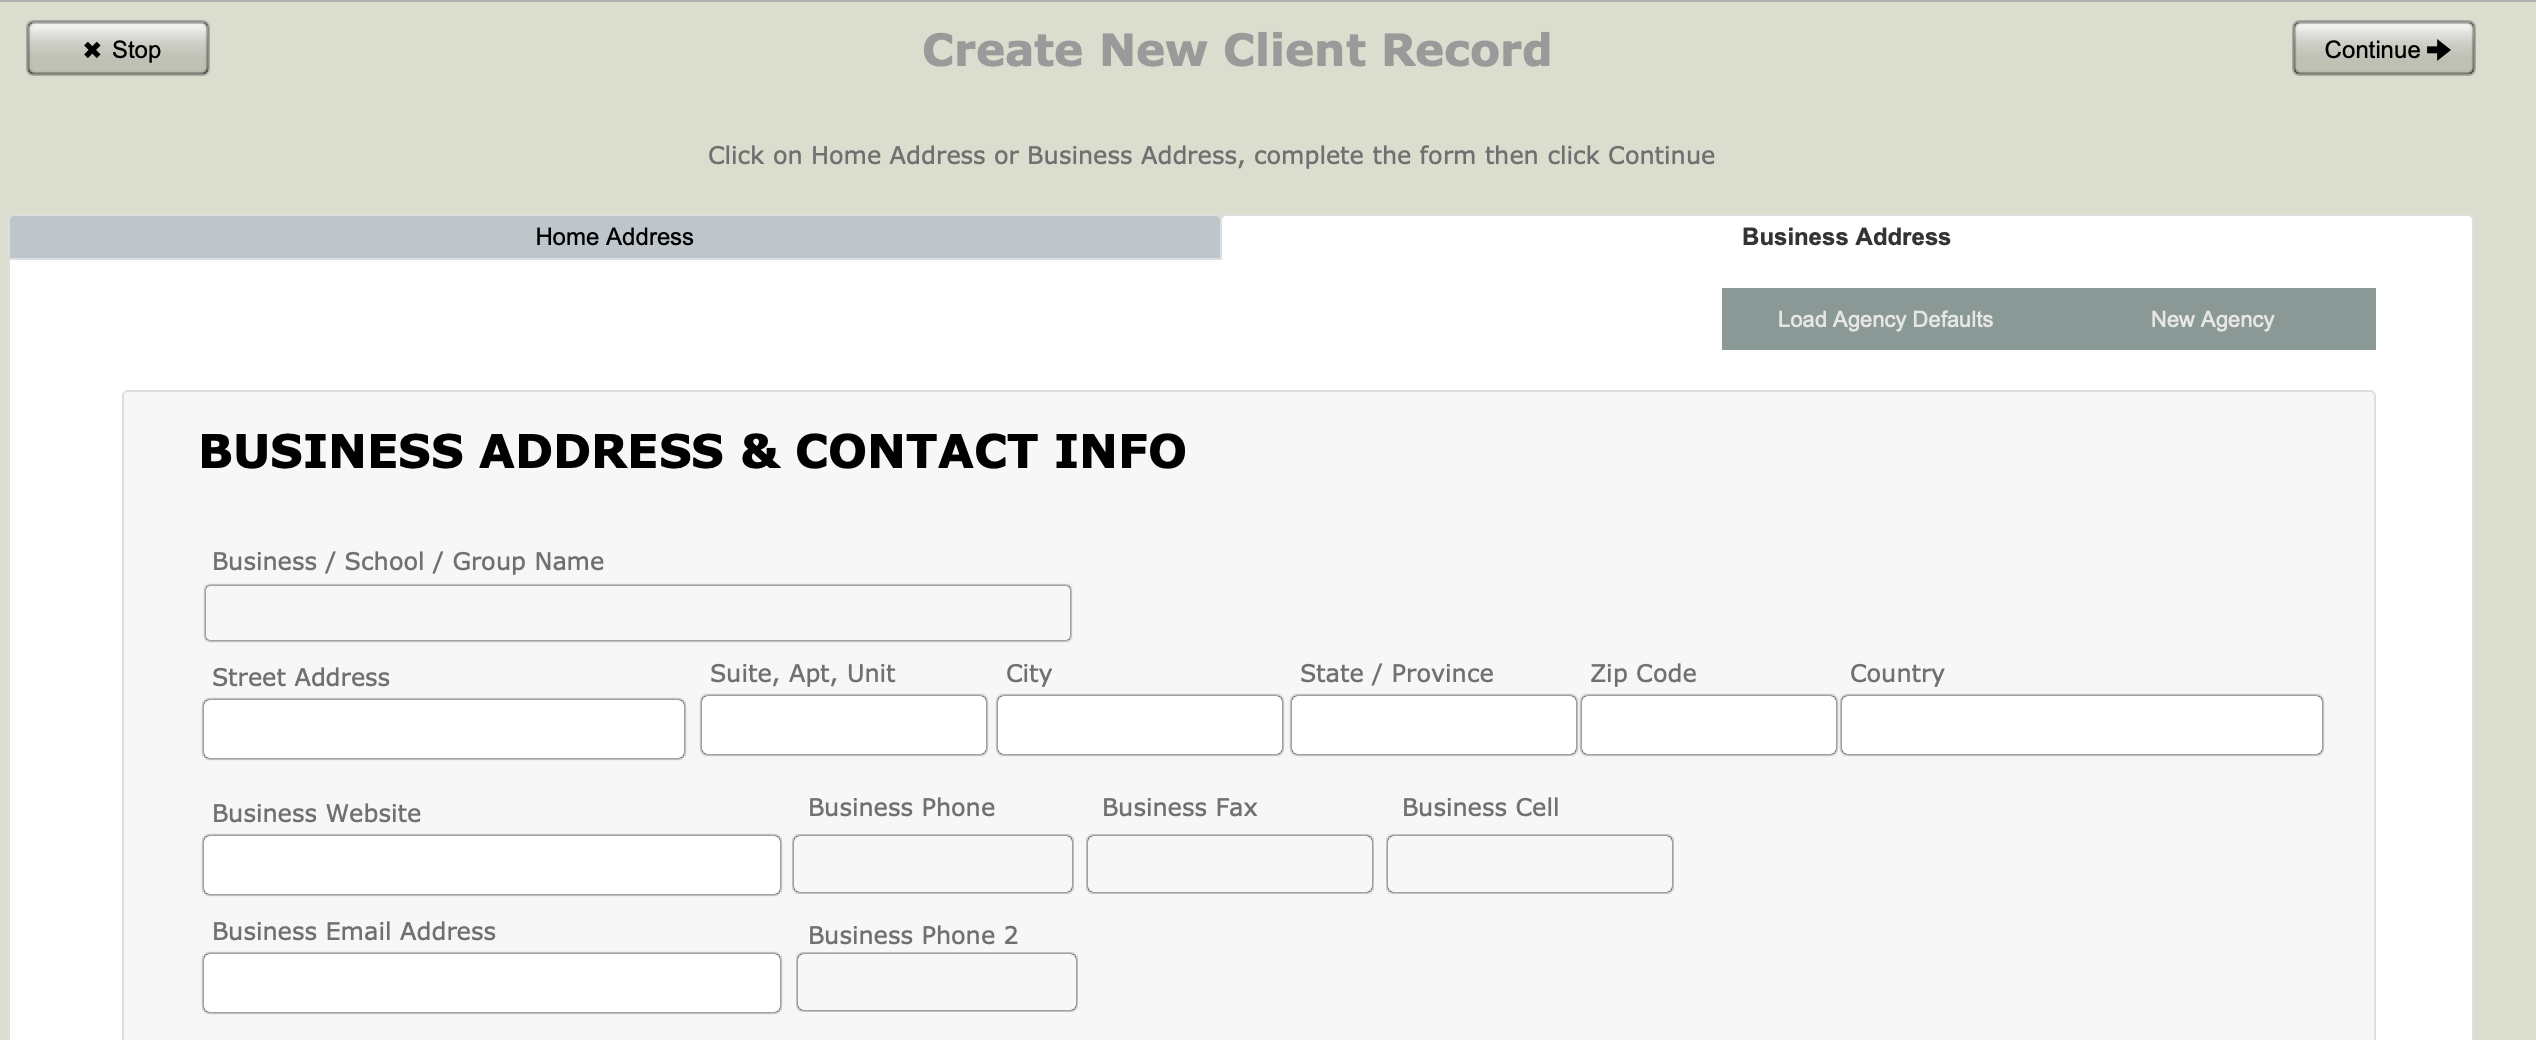
If the record is for a travel agency the process differs slightly. Complete the fields on the Business Address tab then click on either the “New Agency” or the “Load Agency Defaults” button. When you click the former, you are first of all identifying the entity as a “Master Record”. When you click on the latter, you will be stepped through a process by which you will identify a previously created master record whose address, phone, commission level, etc., you want copied into the record you are creating (think agencies with multiple agents that you work with).
As you create records, they will be marked as “Active” (status displays in the upper half of the record, on the right). This allows that a Booking can be made from the Client record. You can change the status, in other words de-activate a record and thereby prevent the possibility of a Booking being made, by clicking on the star icon. Some reasons you may want to “deactivate” a client include:
1. A client may have caused repeated problems on tour and you don’t want them on a future trip. By deactivating their client record and noting why you did so in “Notes”, you can prevent recurring problems.
2. A client may have a balance outstanding that you are having difficulty collecting on and, until the account is closed, you don’t want to allow additional booking activity. Again, you will want to make a note in the record to document the situation.
Note: De-activating a Client record does not prevent its being included in a set of labels you might prepare for a mailing. Usually it is advisable to use “Active” as one criteria when finding records for this purpose. If you de-activate a record for any of the above reasons, you may also want to put them on a “don’t mail” status.
Relating and Linking Clients
This section is all about creating client records that are related and records that are linked. Both could actually be true at the same time. If you sell to a lot of group leaders or resellers, you’ll likely have a large number of linked records in your system, and the basic setup of a record lends itself to the concept of related.
If you’re familiar with how TourTools v3 and v4 handled clients, you were limited to being able to enter up to two names, generally two people living at the same address, in one client record. That always made it a little difficult to separate them when it came to one doing something the other wasn’t. A situation, by example, where you have a husband and wife in the client record, but only one of them is actually going to be traveling.
The video below will demonstrate these two concepts.
If you have any questions that are not answered here Contact TourTools Support for assistance.
Post your comment on this topic.